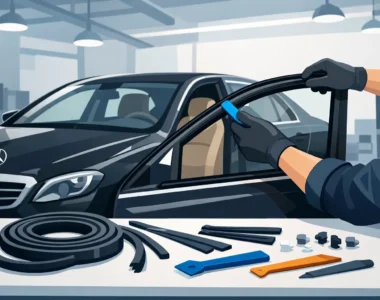

A cloudy center-console strip, cracked glove-box trim, or lifting veneer can make an otherwise well-kept Mercedes interior look neglected. Knowing how to restore Mercedes wood trim starts with identifying what has actually failed. On a W107 SL, W113 Pagoda, W124, W201, R129, or W111, the wood itself is often still sound. The usual problem is the aged clear finish, sun exposure, moisture intrusion, failed adhesive, or damage from decades of incorrect cleaners.
Wood trim restoration is not a one-product job. The correct approach depends on whether the trim needs cleaning, refinishing, veneer repair, or replacement. Original pieces have value, particularly on collector-grade cars, so preserve what can be preserved and replace only what cannot be repaired to a proper standard.
Identify the Type of Damage Before Removing Anything
Start under good light. Wipe the trim with a clean, barely damp microfiber cloth and inspect it from several angles. Dirt and silicone dressing can disguise the true condition of the finish. Avoid soaking the panel, especially around switch openings, mounting studs, and veneer edges.
Fine scratches and dullness usually indicate worn or oxidized clear coat. A milky or white haze can point to moisture trapped beneath an older finish. Long cracks that follow the grain often mean the veneer or substrate has moved over time. Bubbling, lifting edges, and missing sections are signs of adhesive failure or delamination. If the wood is darkened around a window switch, shifter surround, or vent opening, inspect for prior liquid exposure before refinishing.
Do not assume every dark panel needs to be stripped. Many Mercedes interior woods were finished in a deliberately deep tone, and aggressive sanding can remove the original color layer or cut through the veneer entirely. This is especially risky on thin, highly figured burl trim found in later W124s and R129s.
Remove Mercedes Wood Trim Without Breaking It
Removal is where many otherwise repairable panels are damaged. Mercedes used different fastening methods across chassis and production years, including spring clips, screws, studs with retaining nuts, and trim pieces that interlock with adjacent panels. A W107 console panel does not come apart like a W124 dashboard strip, and a W113 wood piece deserves even more caution because good originals are increasingly scarce.
Disconnect the battery if you are removing trim around electrical switches, instrument lighting, airbags, or the radio. Photograph each panel before removal, then photograph the fasteners and wiring as you work. Store screws, clips, and switch hardware in labeled bags by location.
Use plastic trim tools wherever possible. Metal screwdrivers can chip the lacquer, dent adjacent vinyl, and scar soft aluminum trim. Apply pressure close to a clip or mounting point rather than flexing the middle of a long piece. If a panel will not release with controlled force, stop and locate the hidden fastener. Pulling harder is not a repair method.
Once removed, label the back of each piece with low-tack tape. This is particularly useful when restoring matched dash strips, door trim, and console pieces as a set. Keeping pieces in order helps maintain consistent grain direction and color when they go back into the car.
How to Restore Mercedes Wood Trim With Sound Veneer
When the veneer is intact and the problem is limited to surface wear, refinishing is usually the right answer. The goal is to remove failed clear coat while preserving the veneer, original shape, and fitment.
Begin by cleaning with a mild interior-safe cleaner that leaves no oily residue. Do not use furniture polish, heavy silicone products, or harsh household chemicals. They can contaminate the surface and create adhesion problems for later coatings.
Test the existing finish in an inconspicuous area. If it is stable and only lightly hazed, a careful polish may improve its appearance. Use a very mild automotive finishing polish by hand, with minimal pressure, on a small test section first. This will not fix cracked or peeling lacquer, but it can revive trim with superficial dullness.
For failed clear coat, sand the finish gradually rather than attacking it with coarse paper. Start with a fine grit appropriate for finish removal, using a small sanding block on flat areas. Work slowly and keep checking your progress. Edges, corners, and cutouts are the danger zones because the veneer is easiest to burn through there. Hand-sand these areas lightly.
Once the damaged finish is removed, inspect the color. If the wood has retained an even tone, avoid staining it simply because it looks lighter before clear coat. Clear finish naturally deepens the appearance of wood. If color correction is necessary, use a compatible tint or stain sparingly and test it on an unseen area first. A trim set that is too red, too orange, or too dark will look incorrect against original leather, MB-Tex, carpets, and dash materials.
Apply a quality clear finish designed for automotive interior use or professional wood refinishing. Several thin coats are safer than one heavy coat. Heavy application can run around switch openings, obscure veneer figure, and create an overly plastic appearance. Allow full curing time between coats and before reinstalling the trim. A finish that feels dry is not always fully cured.
After the finish has cured, level and polish only if needed. The desired result is a smooth, period-correct gloss, not a modern mirror-like coating that looks out of place in a classic Mercedes cabin.
Repairing Lifting or Cracked Veneer
Lifting veneer should be addressed before any sanding or refinishing. If an edge is still present and can be laid flat, carefully clean dust from beneath it, introduce a suitable wood adhesive in a controlled amount, and clamp the area using padded blocks. Protect the visible face with wax paper or a non-stick barrier so the repair does not bond to the clamp pad.
Do not flood the void with glue. Excess adhesive can seep through a crack, stain the veneer, or prevent the panel from sitting flat. The objective is full contact under the lifted section, not a thick glue line.
Small cracks can sometimes be stabilized and blended during refinishing. Missing veneer is more complicated. A convincing repair requires matching both wood species and figure, then aligning the grain with the surrounding panel. On a highly visible dash piece, a poorly matched patch can be more distracting than an honest original flaw.
If the substrate beneath the veneer is warped, swollen, or crumbling, the panel may not be a good candidate for DIY repair. This is common after water damage. A professional veneer specialist may be able to rebuild the base, but sourcing a correct replacement can be the more practical option when fitment or appearance matters.
Match the Finish Across the Entire Set
Mercedes wood trim was designed as a set. Restoring only the shifter surround while leaving sun-faded dash strips untouched can create an obvious mismatch. Before starting, compare every piece in the cabin: dash, console, door caps, ashtray cover, glove-box trim, and rear trim where applicable.
You do not always need to refinish every panel. A protected passenger-side piece may still be close enough to an improved driver-side piece after polishing. But if multiple panels have failed finish, plan the work as a matched set. Use the same preparation, color process, clear coat, and curing schedule throughout.
This matters most on cars with prominent wood applications. A W113 Pagoda and W111 coupe can look distinctly wrong when one panel has a bright contemporary finish beside original darker trim. On an R129 or late W124, incorrect sheen can be just as noticeable against the surrounding black or mushroom interior materials.
When Replacement Is the Better Restoration Choice
Replacement is justified when veneer is missing across large areas, mounting points are broken, the panel is severely warped, or prior repairs have left the piece beyond credible restoration. It is also the sensible choice when a high-value car needs a model-correct presentation and the original piece cannot be repaired without obvious compromise.
Confirm chassis and production-specific fitment before purchasing trim. Wood patterns, switch cutouts, control layouts, colors, and mounting details can change within a model run. A panel that looks close in a photo may not fit a different year, market specification, or option package.
For original-style restoration work, prioritize trim that matches the correct application and inspect photos carefully for veneer condition, cracks around openings, damaged studs, and fading. Mercedes Parts Zone focuses on classic Mercedes components where model-specific fitment matters, including interior pieces for enthusiast chassis that are no longer simple dealer-counter purchases.
Reinstall With Patience
Before reinstalling, clean the mating surfaces and confirm every switch, vent, button, and clip is correctly positioned. Do not force wood trim into place to overcome a trapped wire or misaligned clip. The panel should sit naturally before final fasteners are tightened.
Use only enough torque to secure screws and nuts. Overtightening can crack old veneer, distort the substrate, or damage studs that may be difficult to replace. Once installed, clean the trim with a dry microfiber cloth and avoid dressing products that leave a slippery or greasy film.
A properly restored Mercedes wood interior should look cared for, not over-restored. Preserve original material where possible, match the finish across the cabin, and treat every panel as a chassis-specific component rather than decorative furniture. That approach protects both the character of the car and the value of the work you put into it.